July 9, 2025
Receipt Printer Not Working – Ticket Won’t Print – Step-by-Step Guide for Windows, Linux, and Mac
Has your receipt printer stopped printing, or have you never been able to get it working? In this tutorial, we’ll walk you through every possible solution—no matter what operating system you use.
Step 1: Choose the operating system you’re using on your computer.
Most likely you’re using Windows, but you might have a Mac or a Linux machine.
Click on the operating system you’re using:
Fixing Receipt Printer Issues on Windows
Issue #1: Windows lost the printer port (most common issue)
This one’s easy to spot: your printer used to work fine, but suddenly it stopped printing.
Chances are Windows has lost the port configuration.
First, make sure your receipt printer is powered on and connected to your computer via USB.
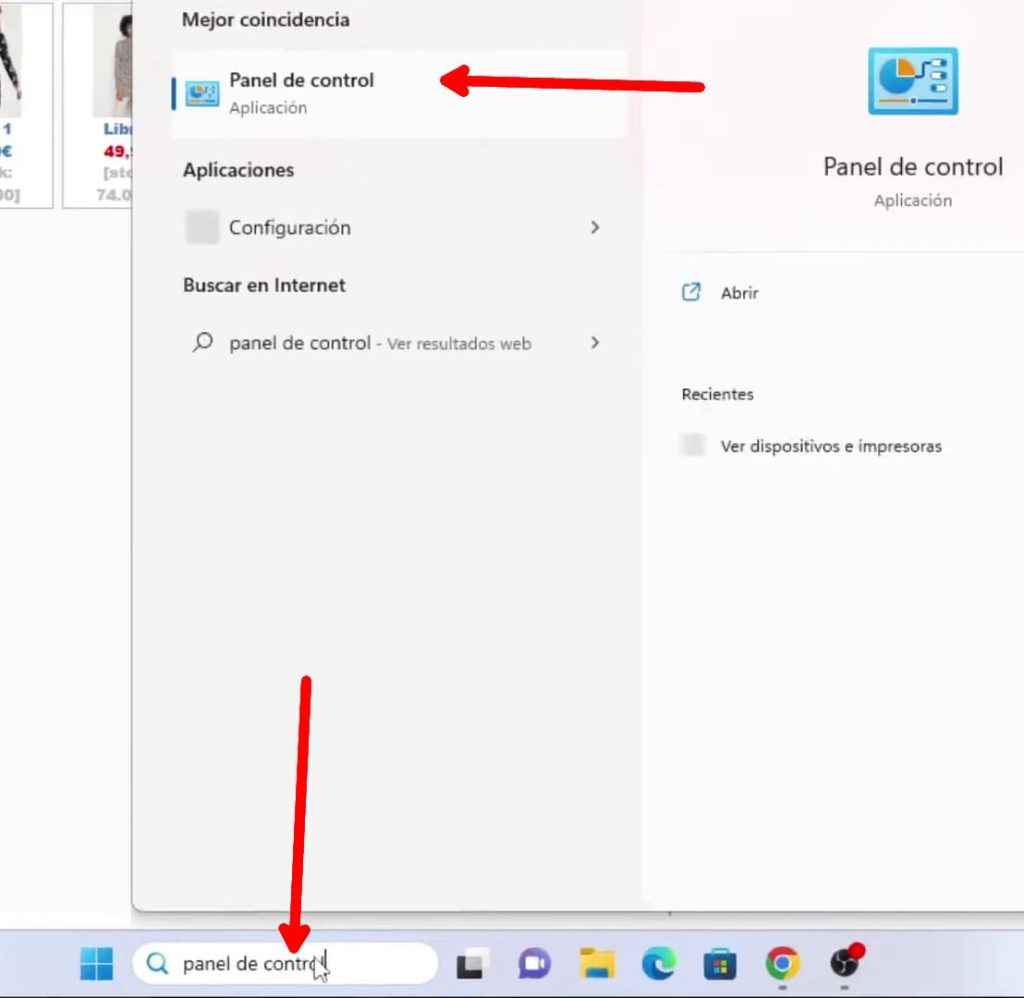
Now, click the Windows Start button and type “Control Panel.” Click on Control Panel when it appears.
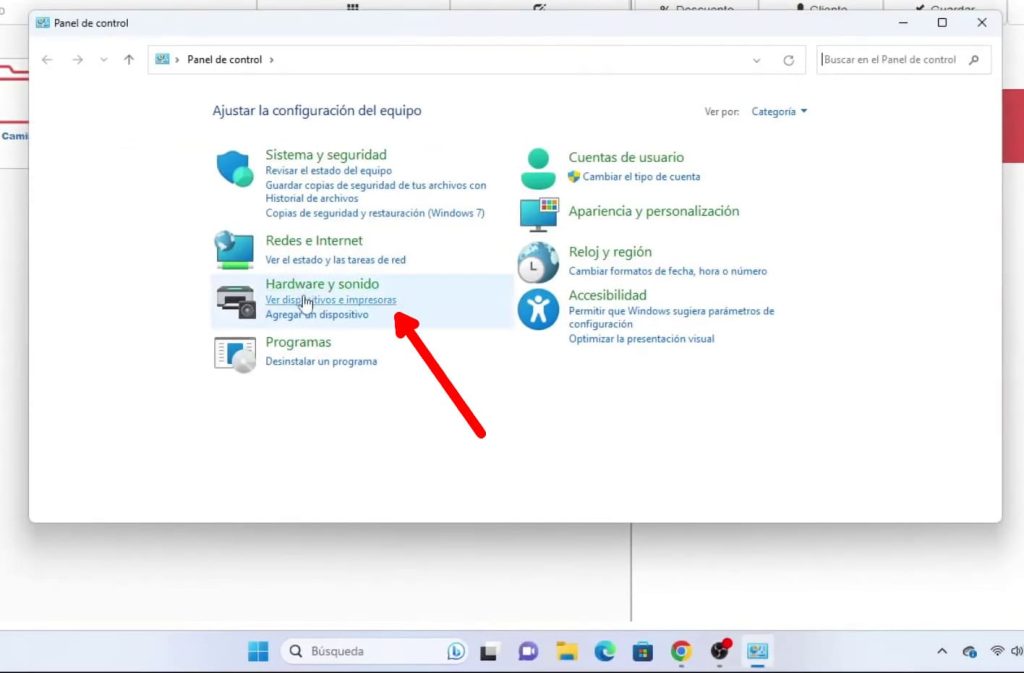
Click on “View devices and printers.”
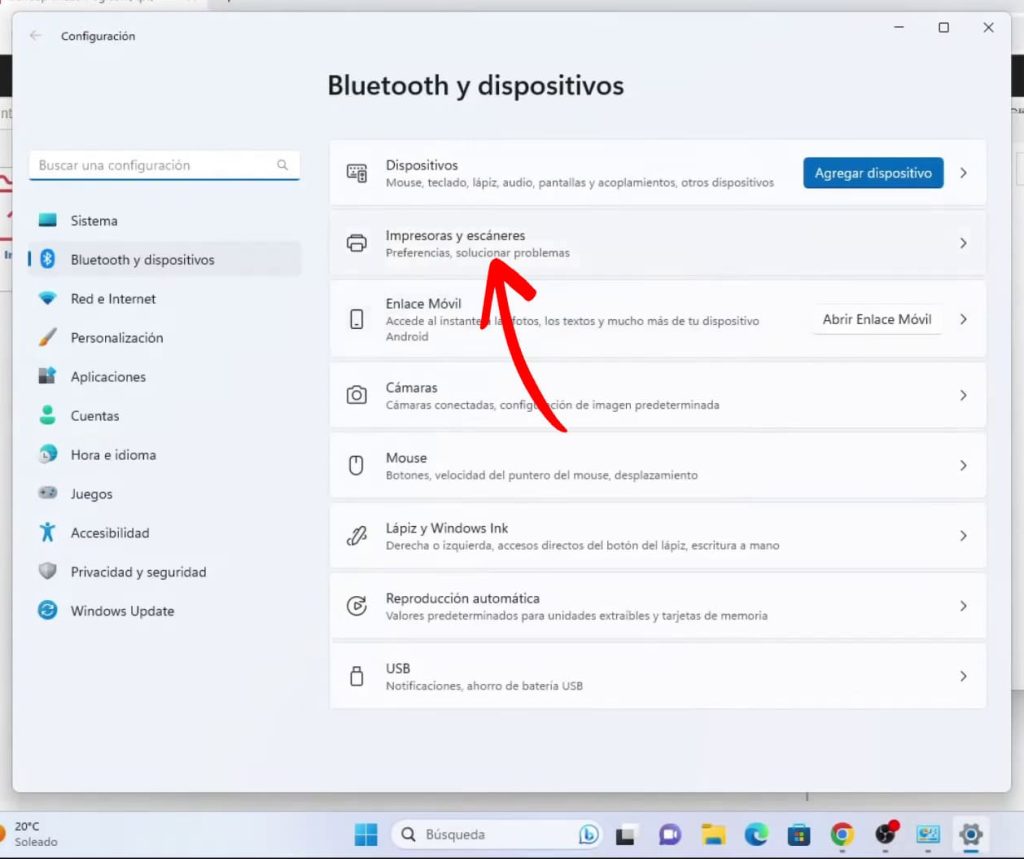
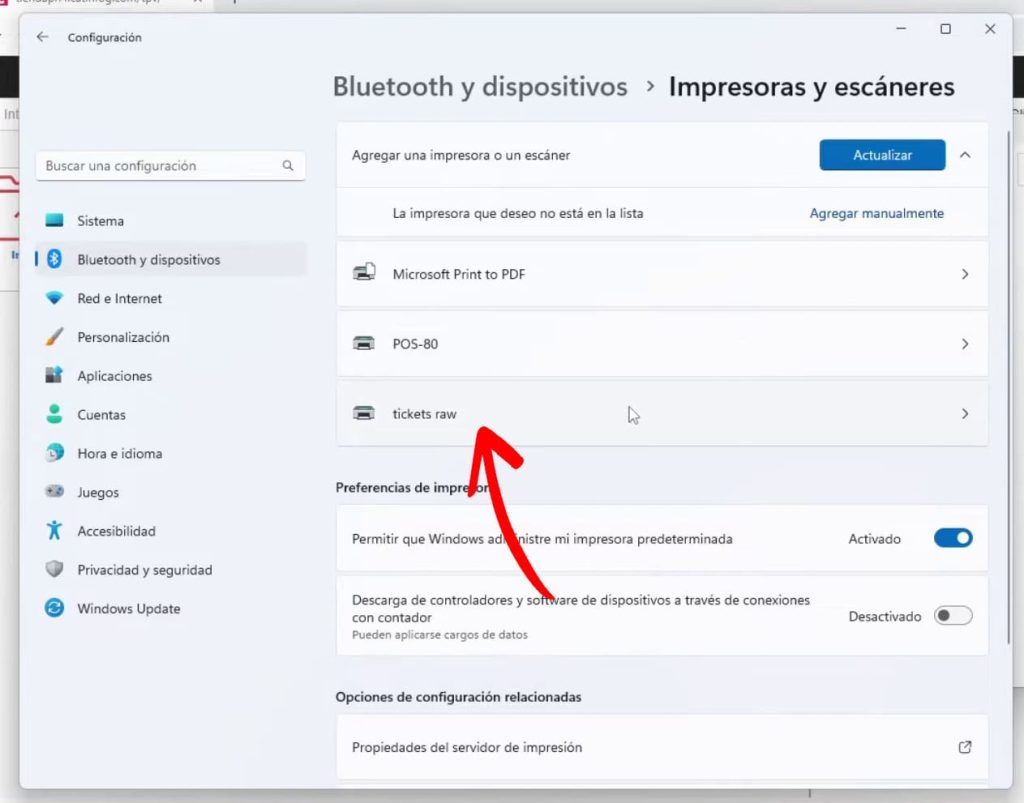
Click on “Printers & scanners.”
Now click on the printer that isn’t working.
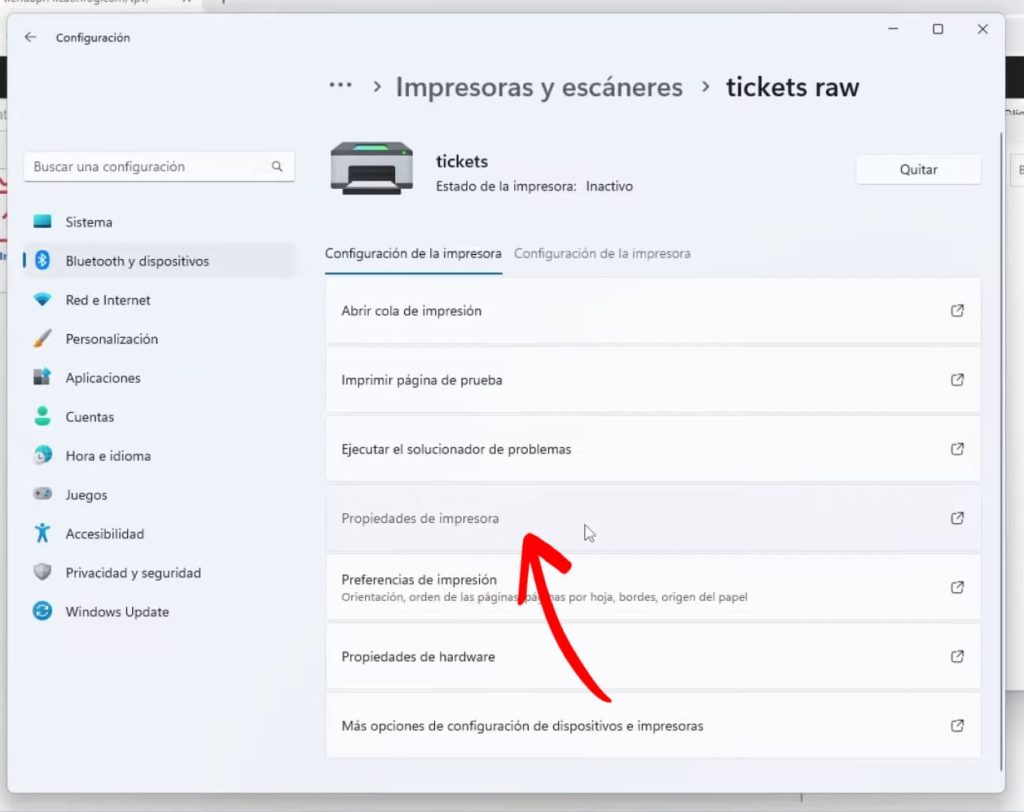
Click on “Printer properties.”
Click on the “Ports” tab.
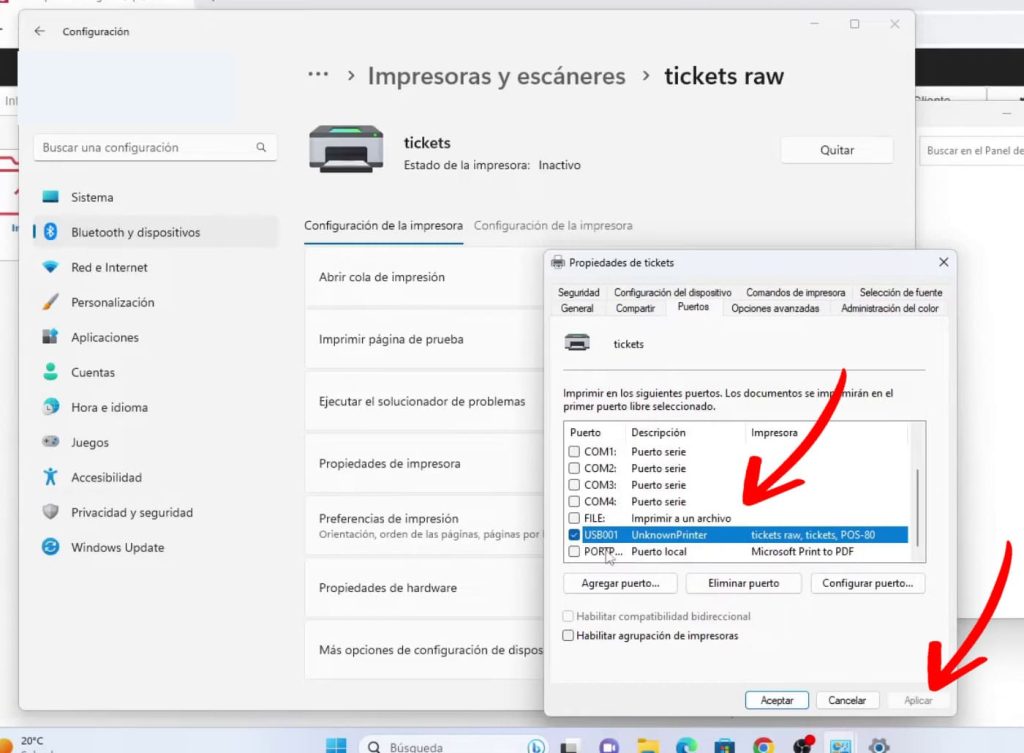
Select any other USB port and click “Apply.”
The printer should print a ticket. If it doesn’t, try selecting the next USB port, click “Apply,” and wait a few seconds to see if it prints. Repeat this process with all the available USB ports until one of them works or you’ve tried them all.
If the ticket still doesn’t print, try the following:
- Make sure the printer is turned on.
- Check that the USB cable is securely connected to both the computer and the printer.
- Unplug the USB cable and plug it back in.
- Turn the printer off and on again.
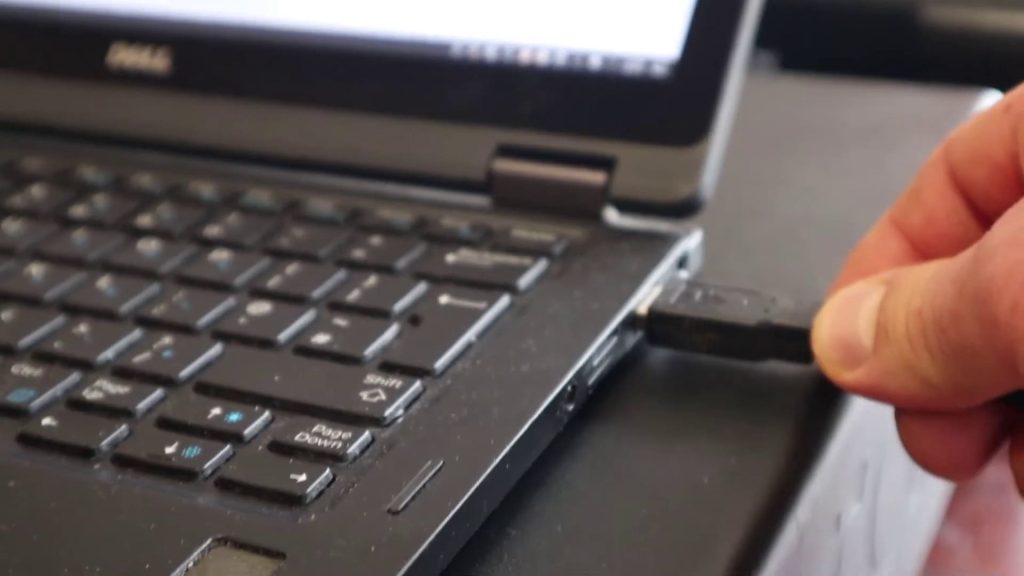
- Physically switch the USB cable to a different USB port. Wait a few seconds, and if it still doesn’t print, keep trying the remaining USB ports until it does.
Then go back to your computer, try changing the printer’s USB port setting again, and click “Apply.” Once you select the correct port, the printer will start printing tickets.
Issue #2: QZ Tray is not running
This is the second most common issue.
Check if the QZ Tray icon appears near the clock in the Windows taskbar. It looks like a small printer icon.
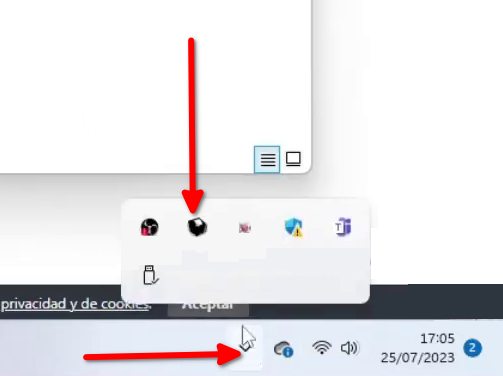
If you see the icon there, then QZ Tray is not the problem. If it’s not visible, you’ve found the issue—and the fix is very simple.
Click the Windows Start button, type “QZ” (without quotes), and click on QZ Tray.
Wait a few seconds until the printer icon appears next to the Windows clock.
Then go back to your POS system, refresh the page
 and make a sale or reprint a ticket. In most cases, it should now work perfectly.
Issue #3: The printer is not properly selected in your Remero panel
This usually happens when you’ve changed the ticket layout from a computer that doesn’t have the printer installed.
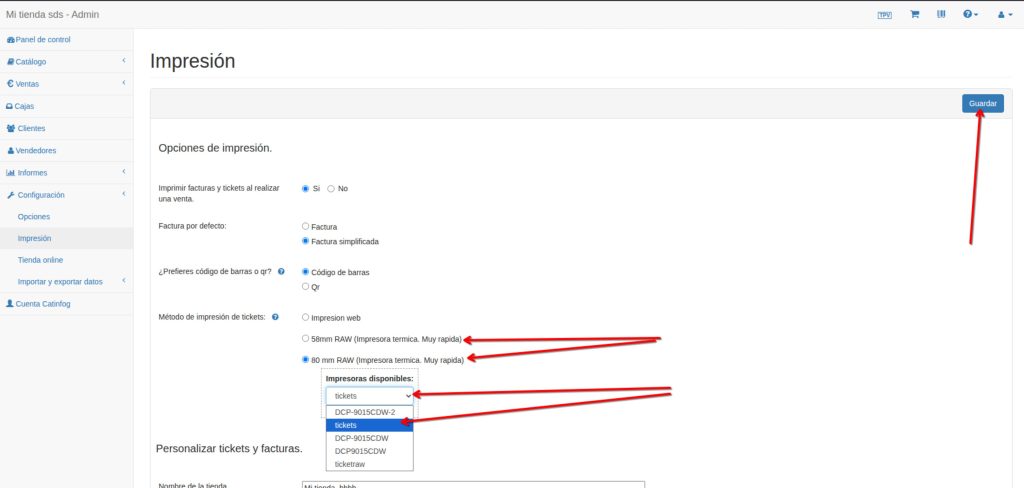
So, go to your POS control panel. Navigate to Settings > Printing.
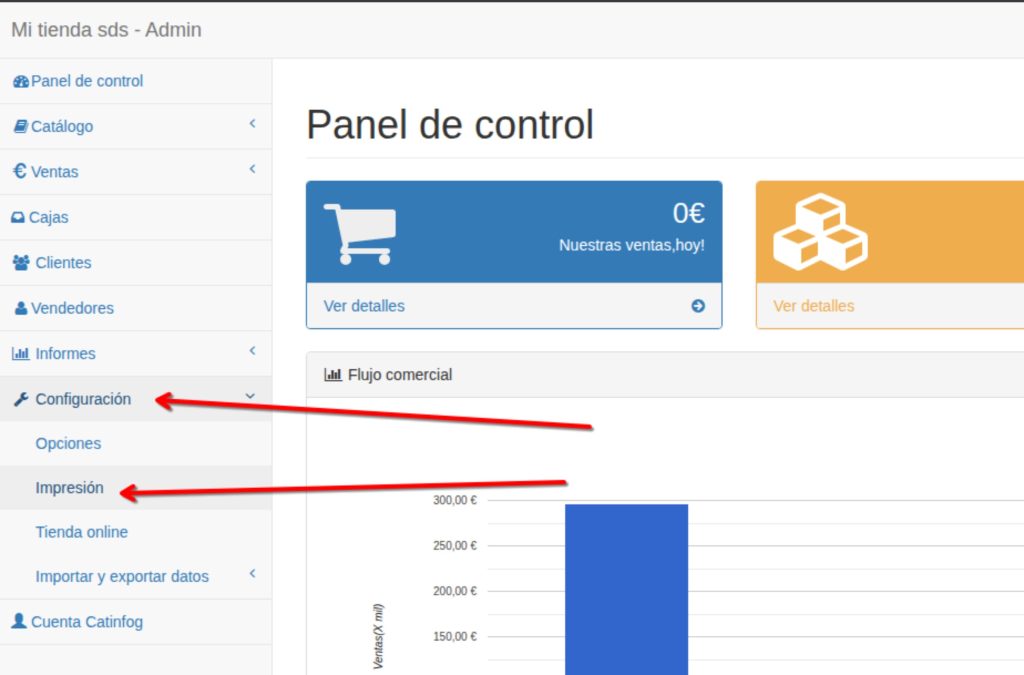
Now select RAW printing, either 58mm or 80mm. Choose your receipt printer and click Save.
Issue #4: The Windows print queue is stuck
If steps 1, 2, and 3 didn’t solve the problem, the print queue in Windows might be jammed and tickets aren’t being sent to the printer.
The quickest fix is to restart your computer. But if that doesn’t work, try clearing the print queue manually:
- Press
Win + R. - Type:
services.mscand press Enter. - Find the service named Print Spooler.
- Right-click it and select Stop.
- Go to the folder
C:\Windows\System32\spool\PRINTERSand delete any files inside. - Return to the Services window, right-click Print Spooler again, and select Start.
The print queue should now be working again without issues.
If it’s still stuck, unfortunately the easiest solution is to fully reinstall Windows. You can do it yourself if you’re tech-savvy, or take it to a computer repair shop (they typically charge between €30 and €50).
Fixing Receipt Printer Issues on Linux
Issue #1: Linux (CUPS) has lost the printer port (most common issue)
It’s true that CUPS is far more reliable than Windows’ print server. But sometimes, it can also lose the port, and print jobs get stuck in the queue without reaching the printer.
To fix this, do the following:
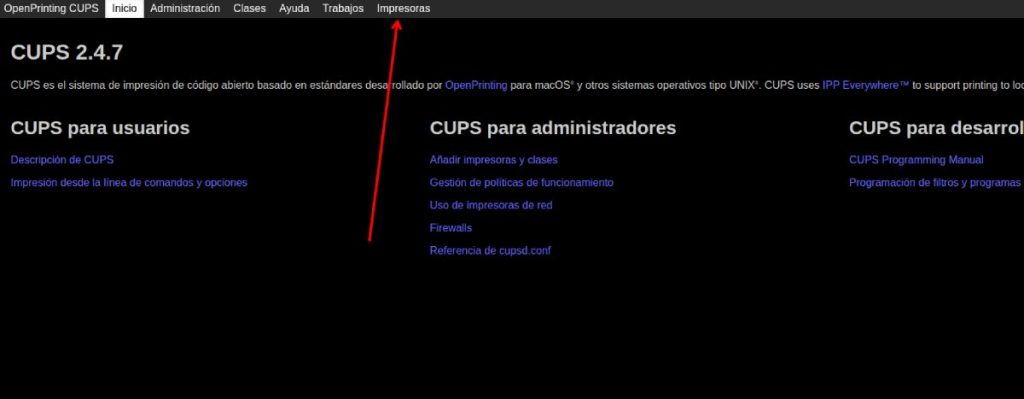
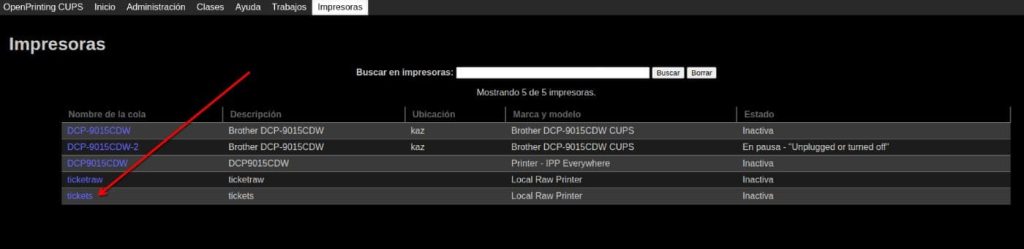
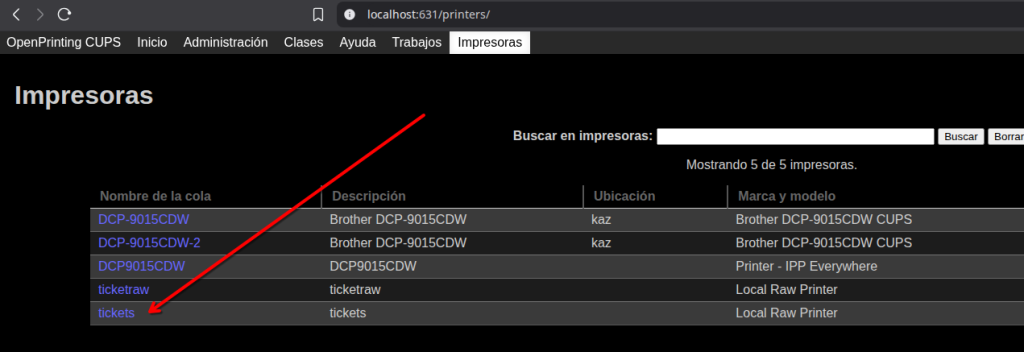
Open http://localhost:631/admin and click on “Printers.”
Click on your receipt printer.
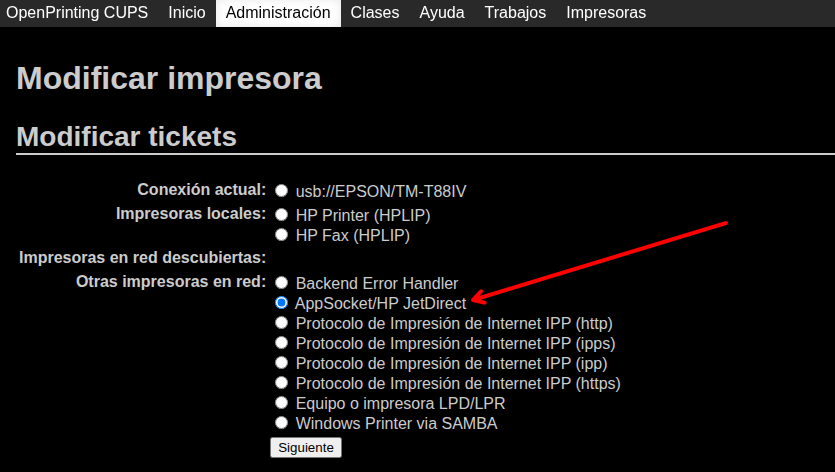
Click on “Administration” and then “Modify Printer.”

Select “AppSocket/HP JetDirect” and click “Continue.”
Now open your terminal, type lpinfo -v | grep usb and press Enter. If nothing shows up, your computer isn’t detecting the printer—check the USB connections or make sure the printer is powered on. Try again until lpinfo -v | grep usb returns a valid printer address.
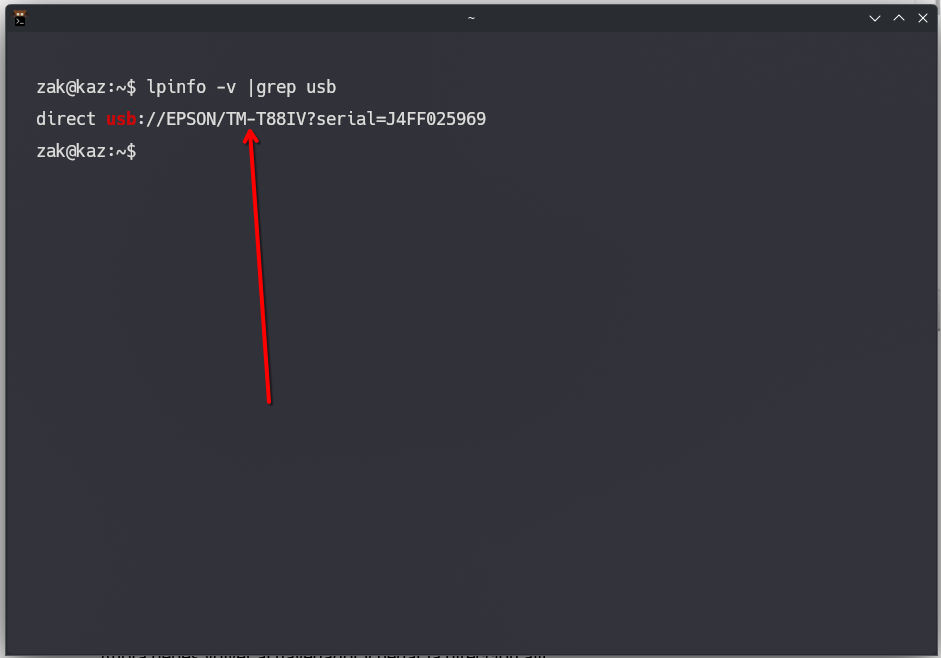
Now copy the printer address (from usb: up to the question mark). In my case, it’s usb://EPSON/TM-T88IV.
Go back to your browser and paste that address into the connection field, then click “Continue.”
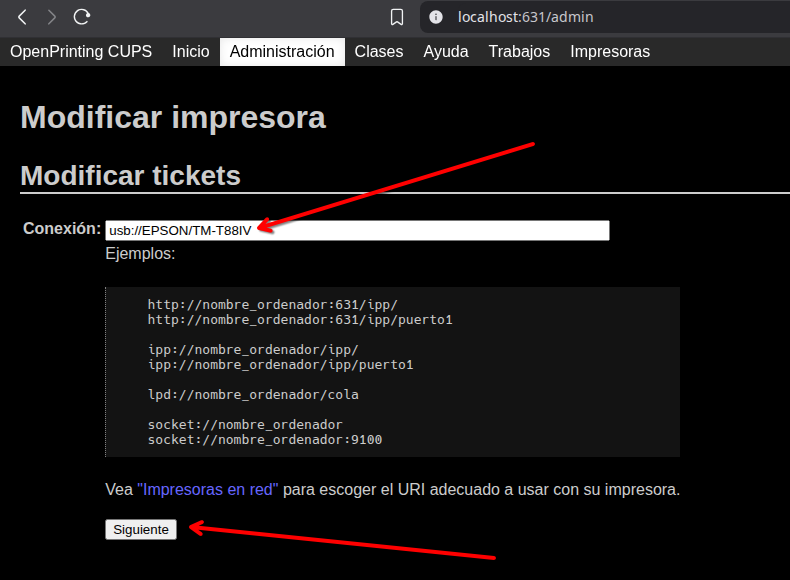
On the next screen, make sure the printer’s name is correctly entered in the “Description” field. Click “Continue.”
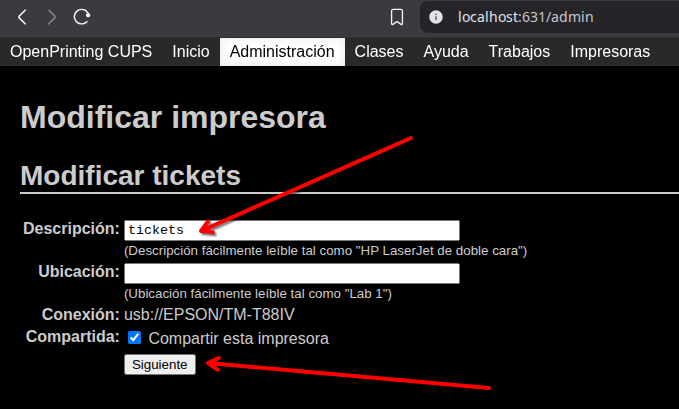
Now select the “Raw” driver and click “Continue.”

Select “Raw Queue” and click “Modify Printer.”

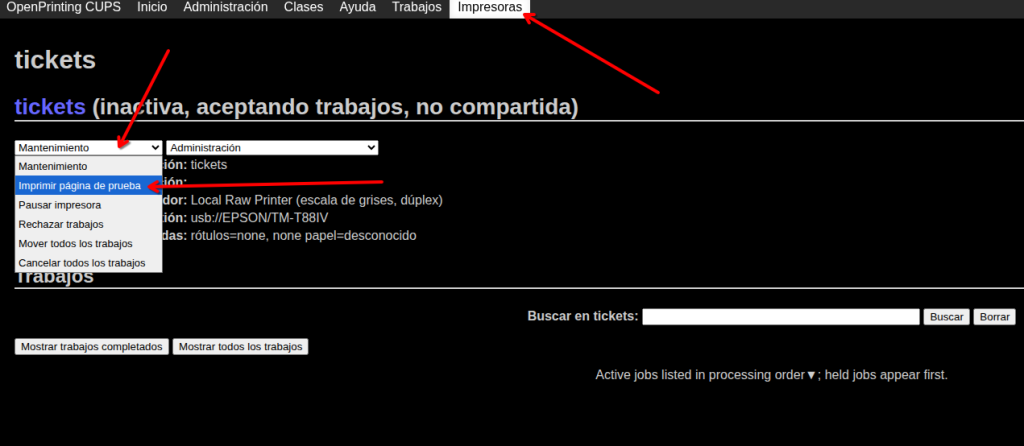
That’s it! Now go back to “Printers” and click on your receipt printer—you’ll be able to run a test print.
The test print should look something like this:
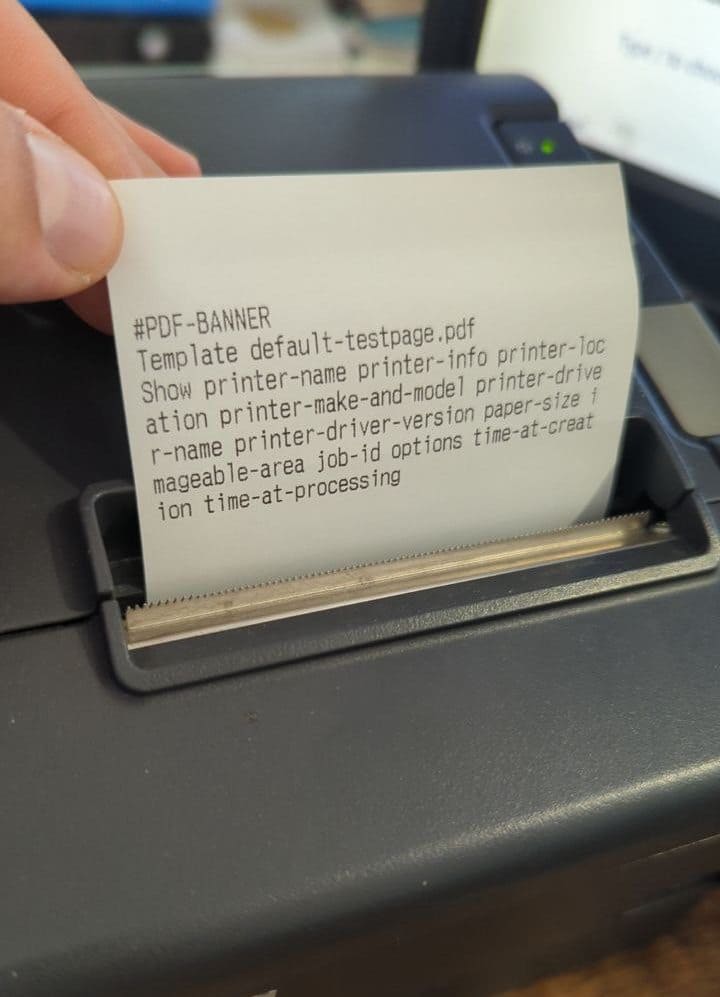
Done! Your printer should now be working again.
Issue #2: Printer not properly selected in your Remero panel
This issue usually happens when you’ve changed the ticket layout from a computer that doesn’t have the printer installed.
Go to your POS control panel. Navigate to Settings > Printing.
Select RAW printing (58mm or 80mm), choose your receipt printer, and click Save.
Issue #3 on Linux: CUPS error “Unable to get list of printer drivers”
This error can happen on some Linux distributions, especially on Arch-based systems where you’re expected to handle system configuration yourself.
The error occurs when trying to install a new printer.
The solution is to run the following commands in your terminal:
sudo mkdir /usr/lib/cups/disabled
sudo mv /usr/lib/cups/driver/* /usr/lib/cups/disabled/
Then verify that drivers are now loading with: lpinfo -m
Restart CUPS by running: sudo systemctl restart cups
Now reinstall your printer, and everything should work as expected.
Issue #4 on Linux: Printer gets stuck in “paused” state
This happens when the error policy is set to “stop-printer.” In simple terms, if the printer runs out of paper or has a minor issue, it will pause and stay paused until manually resumed.
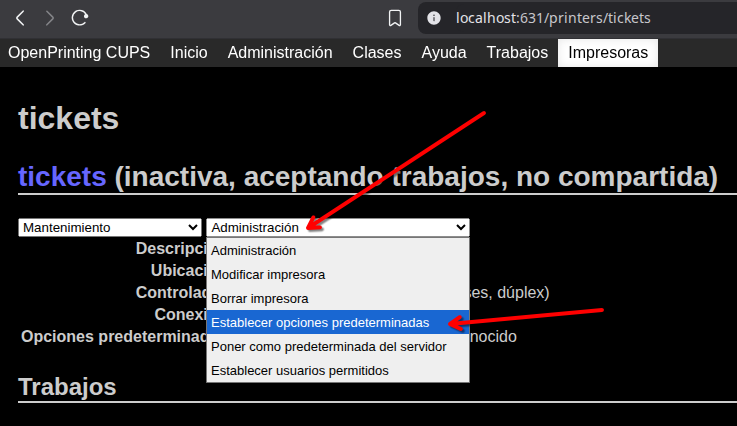
To prevent this, go to http://localhost:631/printers/ and click on your receipt printer.
Then click on “Administration” and choose “Set Default Options.”
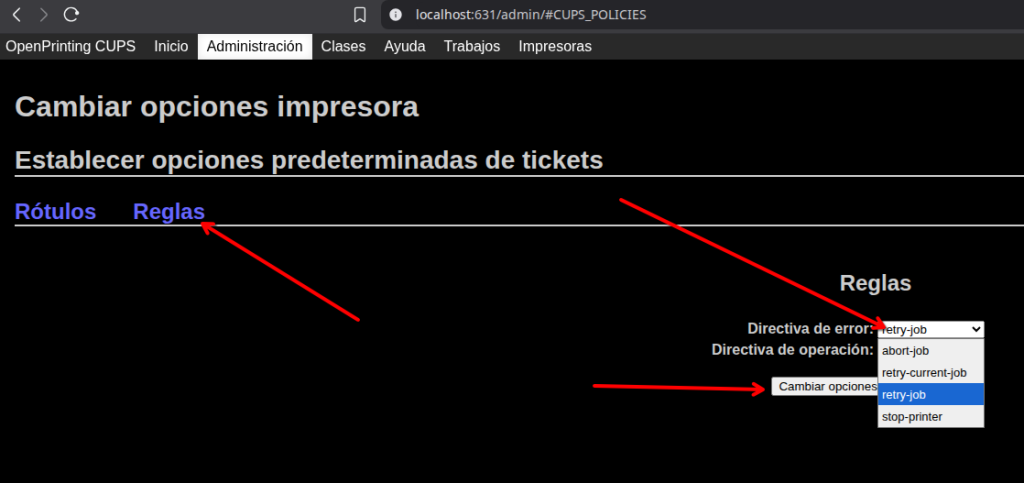
Under “Policies,” change the error policy to retry-job. Finally, click “Set Default Options.”
That’s it! If the printer pauses due to a minor error, it will now automatically resume once the issue is resolved.